Maybe your current host has slowed to a crawl, the renewal invoice doubled without warning, or support takes two days to answer a simple question. Whatever the reason, you've decided to move your website to a new host — and now a quiet worry sets in: what if the site goes down, or I lose everything, the moment I switch?
It's a fair worry, but a misplaced one. A website migration that goes wrong almost always comes down to doing the steps in the wrong order — not to the move being inherently dangerous. Done methodically, you can move a site to a new host with zero data loss and zero downtime, so visitors never notice a thing.
This guide walks through exactly how to do that: what a website is actually made of, the safe order to move each part, how to point your domain across without a gap, and the common mistakes that catch people out. We'll keep it plain enough for a first-timer, with the Malaysian specifics that matter.
Why Move Your Website to a New Host?
Most people don't migrate on a whim — they hit a wall. The usual triggers:
- Slow performance. Pages drag, especially under traffic, and your visitors leave before they load. If speed is your issue, our Core Web Vitals beginner's guide explains what "fast enough" actually means.
- Price hikes at renewal. That tempting first-year price renews at two or three times the rate. A lot of migrations are simply about getting back to fair pricing.
- Poor or slow support. When something breaks at 2am before a campaign, support that replies in days instead of minutes costs you real money.
- Outgrowing your plan. Resource-limit warnings and throttling mean it's time for more room — sometimes on a bigger plan, sometimes a different provider. Our guide on how to choose the best web hosting in Malaysia covers what to look for.
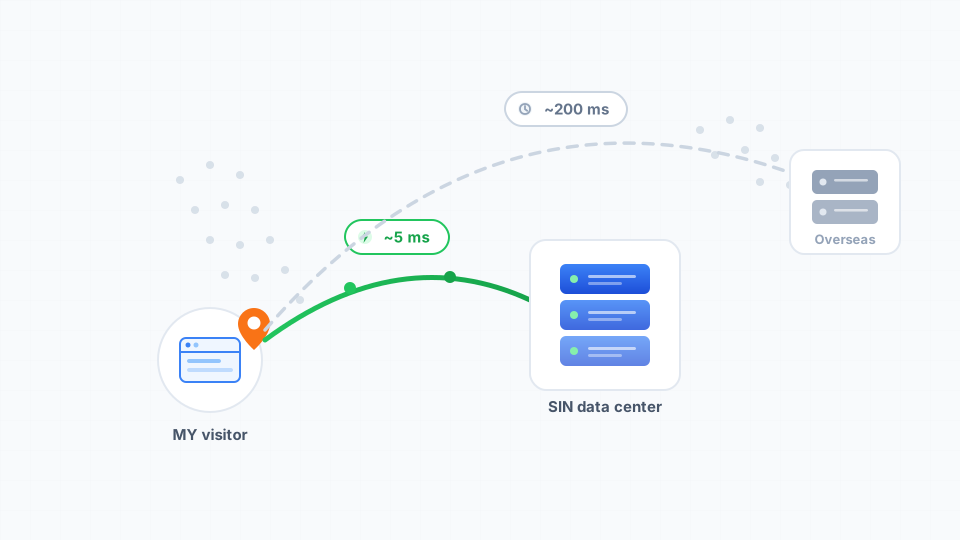
- Wanting local servers. If your host's servers sit far from your audience, moving to infrastructure in or near Malaysia cuts load times for your local visitors.
What a Website Is Actually Made Of
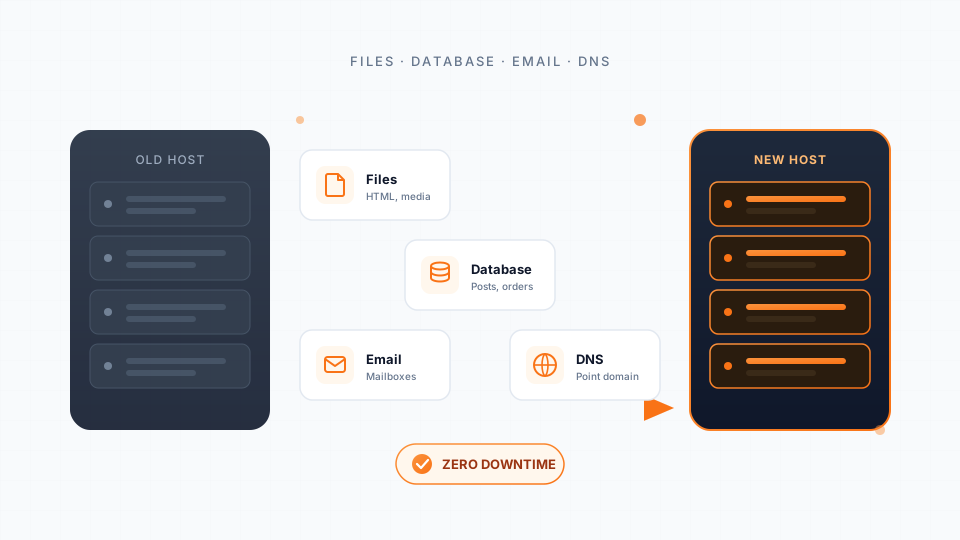
Before moving anything, it helps to know what you're moving. A typical website has four parts, and a clean migration accounts for all four:
- Files. Your themes, plugins, images, and code — everything in your hosting account's folders.
- Database. For WordPress and most modern sites, this is where your posts, pages, settings, products, and orders live. The files alone are not enough; without the database, a WordPress site won't load.
- Email. Mailboxes tied to your domain (like
[email protected]), plus the messages inside them. This is the part people most often forget — and the most painful to lose. - DNS and the domain. The settings that tell the internet where your website and email live. Migration finishes here, by pointing the domain at the new server.
Step 1: Set Up the New Host — Don't Cancel the Old One Yet
The single most important rule of migration: keep your old hosting active until the move is finished and verified. Your old host is your safety net and your live site while you work. Cancelling early is the most common way people lose data permanently.
Sign up for your new plan and get into its cPanel (or whichever control panel it uses). At this point you have two accounts running in parallel: the old one still serving visitors, and the new one sitting empty, ready to receive your site.
If your new host offers free migration — many in Malaysia do, including Cynet — this is the moment to use it. You hand over your old login details and their team moves everything for you. We'll come back to that easy path at the end.
Step 2: Back Up Everything First
Even though your old site stays live, take a full backup before you touch anything. It's your insurance policy.
In cPanel, use the Backup Wizard to download a full backup, or grab the pieces separately:
- Files: compress your site folder (usually
publichtml) into a.zipand download it, or use the File Manager / FTP. - Database: export it from phpMyAdmin as a
.sqlfile. - Email: if you're keeping mailboxes, back those up too.
Step 3: Move Your Files and Database
Now copy your site to the new host:
- Upload the files. Put your files into the new account's
publichtmlvia File Manager or FTP. Wait for every file to finish transferring — a half-uploaded site breaks in confusing ways. - Create a fresh database on the new host and a database user, and note the name, username, and password.
- Import your data into that database through phpMyAdmin, using the
.sqlfile you exported. - Update the connection details. Point your site's config file at the new database — for WordPress that's
wp-config.php(theDBNAME,DBUSER, andDB_PASSWORDvalues). This step is the one beginners miss most: new files plus old database credentials equals a site that won't connect.
Step 4: Move Your Email
If your email is hosted with your website (rather than on a separate service like Google Workspace or Microsoft 365), recreate each mailbox on the new host using the same email addresses and the same domain. Then migrate the existing messages — many control panels and tools can copy mail over IMAP so nothing is lost.
Email deserves real attention because a dropped mailbox means missed customer enquiries, and that's lost business. For a fuller picture of running mail on your own domain, see our guide to email hosting in Malaysia.
Step 5: Test on the New Server Before Going Live
Here's the trick that makes zero-downtime migration possible: test the site on the new host while your domain still points at the old one. Your visitors stay on the live site the whole time; you preview the copy privately.
Most hosts give you a way to do this — a temporary URL, or a hosts file edit on your own computer that makes only your machine load the domain from the new server. With that in place, click through everything:
- Does the homepage load? Do internal pages and links work?
- Do images and styling appear correctly?
- Do forms, logins, and checkout work?
- For a store, can you complete a test order?
Step 6: Point Your Domain to the New Host
This is the actual "go live" moment. You update your domain's DNS so the world starts loading the site from the new server instead of the old one. In practice that usually means changing the nameservers (or the A record) at wherever you manage your domain, to the values your new host provides.
DNS changes don't take effect instantly — they propagate across the internet, typically within a few hours and up to 48 in the worst case. During that window, some visitors see the new server and some still see the old one. This is exactly why Step 1 matters: because both hosts hold a working copy, nobody hits a broken page either way. If DNS feels like a black box, our walkthrough on DNS explained: pointing your domain to your hosting breaks it down step by step.
To shorten the changeover, lower your domain's TTL (time-to-live) to its minimum a day before you switch, so the old records expire quickly.
Step 7: Keep the Old Host Running for a Week
Resist the urge to cancel the old account the moment the site loads from the new server. Give it about a week. This covers full DNS propagation and lets any straggling email still routed to the old server arrive while you confirm the new mail is flowing.
Use that week to verify on the new host:
- The site loads correctly for everyone (ask a friend on a different network to check).
- New email arrives and you can send from your addresses.
- Forms and checkout work in the real, live environment.
- Your SSL certificate is active so the site shows the padlock and loads over
https.
Common Migration Mistakes to Avoid
- Cancelling the old host too early. The number-one cause of lost sites. Keep it until everything is verified.
- Forgetting email. Files and database get the attention; mailboxes get forgotten, and missed customer mail is expensive.
- Skipping the test step. Pointing DNS at an untested copy turns a private hiccup into a public outage.
- Ignoring the database credentials. New files with old database details is the classic "why won't it connect?" trap.
- Migrating right before a big day. Never move the day before a sale, launch, or campaign. Pick a quiet, low-traffic window.
- Forgetting the SSL certificate. Set up HTTPS on the new host so visitors don't meet a "not secure" warning.
The Easy Way: Free Managed Migration
Everything above is very doable yourself — but you don't have to do it alone. Many Malaysian hosts, Cynet included, offer free, fully managed migration: their team moves your files, database, email, and DNS for you, tests it, and coordinates the go-live so there's no downtime.
If you're not confident on the command line, are short on time, or simply don't want to risk a misstep on a site that earns you money, this is the sensible route. You get an expert handling the order-of-operations while you carry on running your business.
Cynet's free website migration does exactly this — typically completed within 24–48 hours with zero downtime, handled end to end by the support team. If you're also weighing up which plan to land on, our web hosting overview lays out every option side by side, and business hosting is a solid starting point for most growing Malaysian sites.
Wrapping Up
Moving your website to a new host isn't the gamble it feels like — it's a sequence. Set up the new host and keep the old one running, back everything up, move your files and database, bring your email across, test privately, point your DNS, and only then retire the old account.
Follow that order and a migration is calm and uneventful, which is exactly what you want: your visitors keep browsing, your email keeps arriving, and you simply end up on a faster, better-supported host. And if you'd rather not touch any of it, a free managed migration hands the whole job to people who do it every day.