
Creating a professional email address like [email protected] is one of the first things you should do after setting up your hosting. Cynet hosting includes unlimited email accounts on most plans, all managed through cPanel.
Prerequisites
Before you begin, make sure you have:
- An active Cynet hosting plan
- A domain pointed to your hosting (nameservers:
ns1.cynethost.comthroughns4.cynethost.com) - Access to your cPanel dashboard
Steps
Step 1: Log in to cPanel
Go to yourdomain.com/cpanel or log in via your Cynet client area and click cPanel Login under your active hosting plan.
Step 2: Open Email Accounts
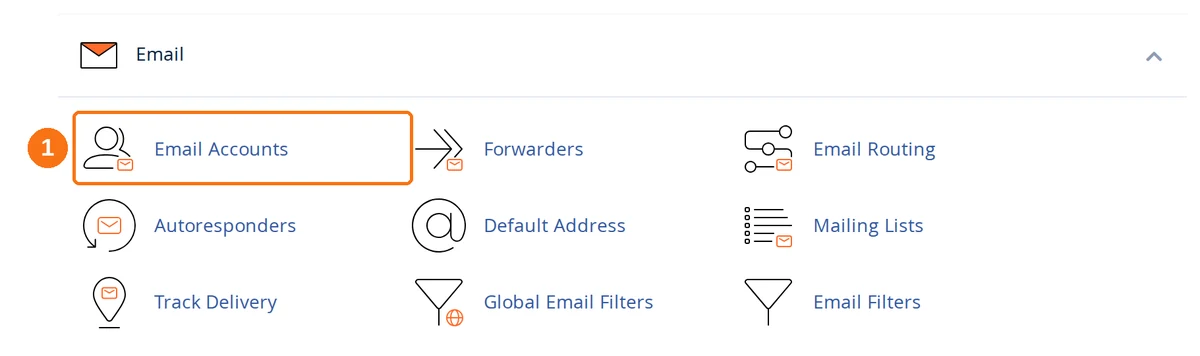
In the cPanel dashboard, scroll to the Email section and click Email Accounts.
Step 3: Click Create
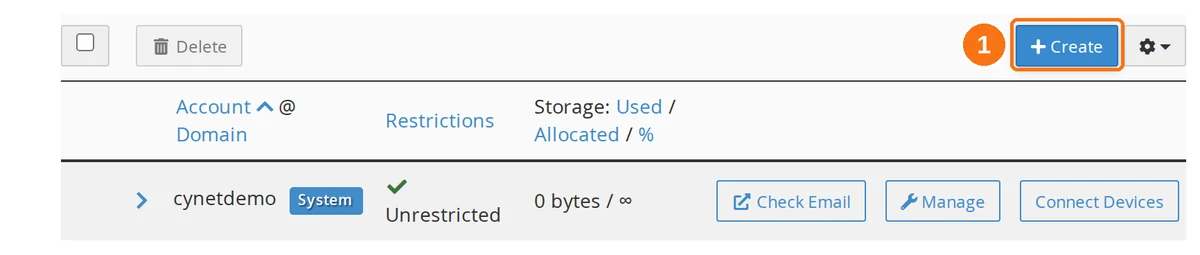
On the Email Accounts page, click the blue + Create button on the right.
Step 4: Configure Your New Email
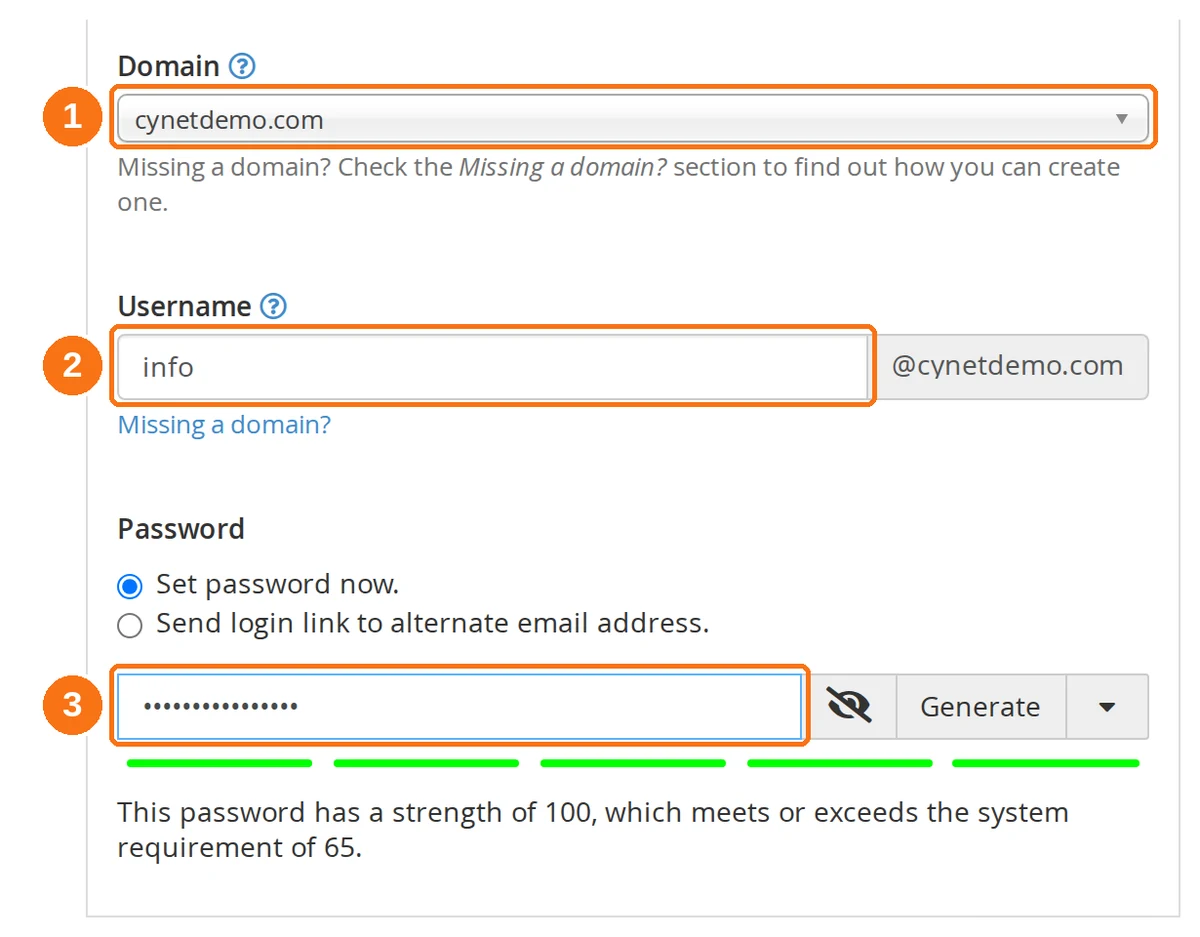
Fill in the three fields, top to bottom:
- Domain — Select the domain for the new address. If your account only has one domain, it is already selected.
- Username — The part before the
@(for exampleinfo,hello,support,admin). The domain you picked is shown to the right of the field. - Password — Type a password, or click Generate to have cPanel create one. Click the eye icon to reveal what you typed.
Tip: If you are creating the mailbox for someone else, choose Send login link to alternate email address instead of setting a password. cPanel emails them a link so they can set their own password, and you never have to handle it.
Step 5: Check the Optional Settings
Click Edit Settings to expand Optional Settings. This section is collapsed by default, so it is easy to miss — and the default storage limit is not unlimited.
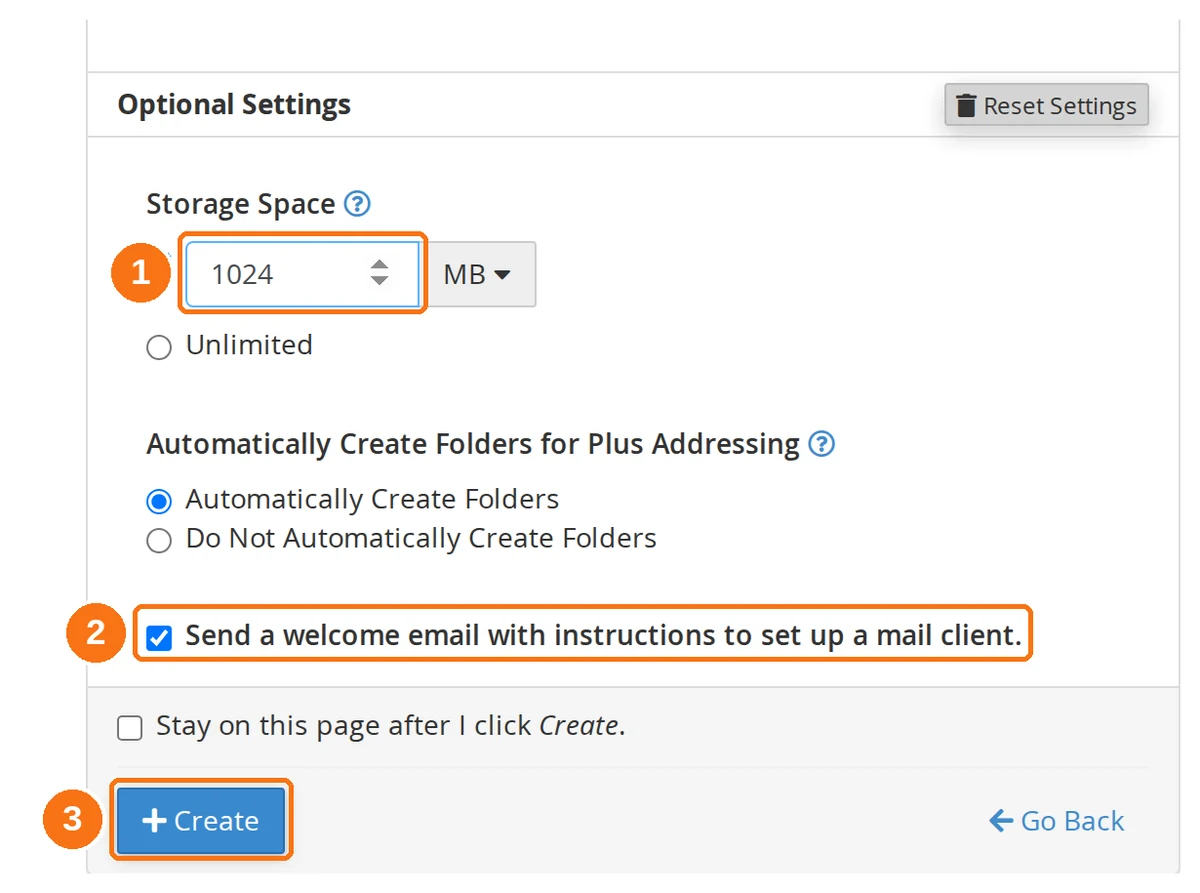
- Storage Space — Defaults to 1024 MB (1 GB). Raise it, or select Unlimited to let the mailbox use whatever space your hosting plan has left. A mailbox that hits its limit starts bouncing incoming mail, so set this deliberately rather than leaving it.
- Send a welcome email with instructions to set up a mail client — Ticked by default. The welcome mail lands in the new mailbox with the server names and ports already filled in, which is handy if someone else will be setting up Outlook or their phone.
- + Create — Click to finish. The account is active immediately.
[email protected] is filed into an info/receipts folder automatically.
Accessing Your New Email
You have several ways to access your email:
Webmail (Browser-Based)
- Go to
yourdomain.com/webmail - Enter your full email address and password
- Choose a webmail client (Roundcube is recommended)
Email Client (Desktop/Mobile)
Use these settings to connect from Outlook, Thunderbird, or mobile devices:
| Setting | Value |
|---|---|
| Incoming Server (IMAP) | mail.yourdomain.com |
| IMAP Port | 993 (SSL) |
| Outgoing Server (SMTP) | mail.yourdomain.com |
| SMTP Port | 465 (SSL) |
| Username | Your full email address |
| Authentication | Password |
Tip: Use IMAP instead of POP3 if you want to access your email from multiple devices and keep everything in sync.
mail.yourdomain.com works once your domain points at Cynet hosting. If your mail client shows a certificate warning, use the server hostname instead — cPanel prints the exact one to use under Email Accounts → Connect Devices, along with the same ports listed above.
Managing Email Accounts
Back in cPanel → Email Accounts, you can:
- Check Email — Open webmail for that account without a separate login
- Manage — Change the password, adjust the storage limit, suspend the account, or delete it
- Connect Devices — Show the exact server names and ports for Outlook, Thunderbird or a phone, plus one-click setup scripts for common clients
Best Practices
- Use descriptive addresses:
info@,support@,hello@for public-facing,firstname@for personal - Set strong passwords: Use the cPanel password generator for maximum security
- Set up SPF/DKIM: These are usually configured automatically by cPanel, but verify under Email → Email Deliverability
- Create a catch-all carefully: A catch-all address receives email sent to any non-existent address on your domain — this can attract spam