
Softaculous is a one-click auto-installer available in cPanel that lets you install WordPress (and 400+ other applications) in under a minute. This is the recommended method for installing WordPress on Cynet Business Hosting plans.
On a WordPress Hosting plan? Your WordPress is pre-installed and managed via WP Toolkit instead. See How to Use WP Toolkit.
Prerequisites
- A Cynet Business Hosting plan (or any plan with Softaculous)
- A domain pointed to your hosting (
ns1.cynethost.comthroughns4.cynethost.com) - Access to cPanel
Steps
Step 1: Log in to cPanel
Navigate to yourdomain.com/cpanel or log in via the Cynet client area at manage.cynet.com.my → My Services → Web Hosting → Manage → cPanel Login.
Step 2: Open Softaculous
In the cPanel dashboard, scroll to the Software section and click Softaculous Apps Installer.
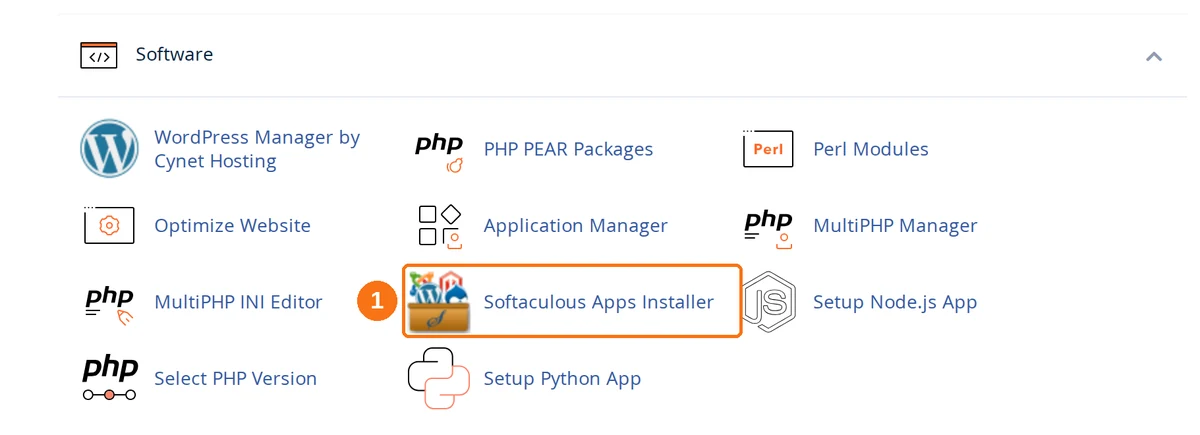
You may also see a WordPress quick-install icon directly on the cPanel homepage — clicking that takes you straight to the WordPress installer.
Step 3: Select WordPress
WordPress sits first under Top Scripts on the Softaculous home page. Click Install on its card.
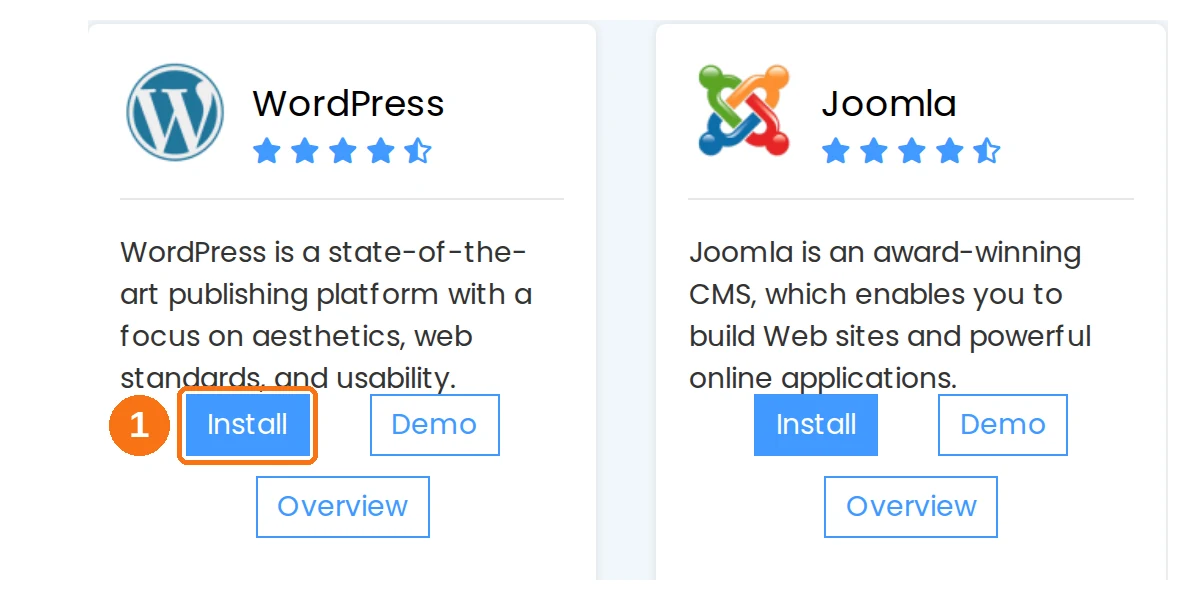
On your first visit Softaculous opens a Featured WordPress Plugins pop-up over the form. Click Remind me later to dismiss it — it only appears once.
Step 4: Configure the Installation
Software Setup
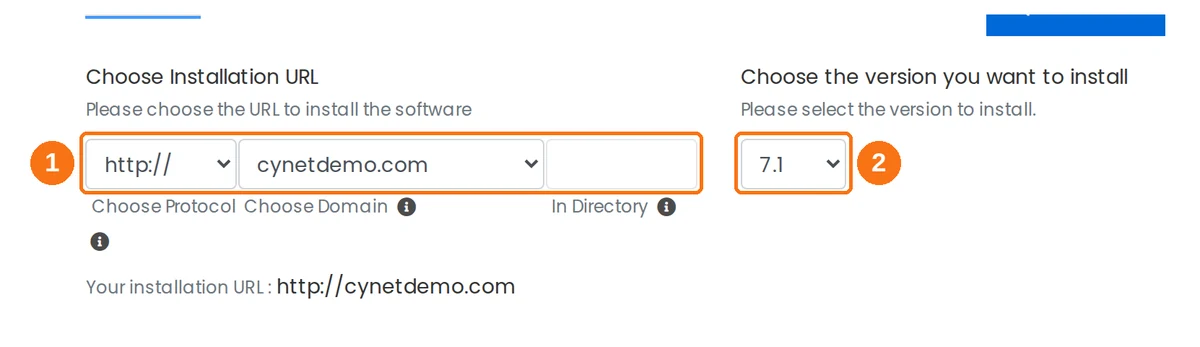
Choose Installation URL (marked 1) is three fields, left to right:
| Field | What to enter |
|---|---|
| Choose Protocol | Defaults to http://. Pick https:// if your SSL certificate is already active — see Set up AutoSSL |
| Choose Domain | Your domain. Subdomains and addon domains appear here too, as long as they already exist in cPanel → Domains |
| In Directory | Leave blank to install on the root domain. Enter a folder name (e.g. blog) to install at yourdomain.com/blog |
Choose the version (marked 2) defaults to the newest release. Keep it unless an existing theme or plugin pins you to an older branch.
Site Settings and Admin Account
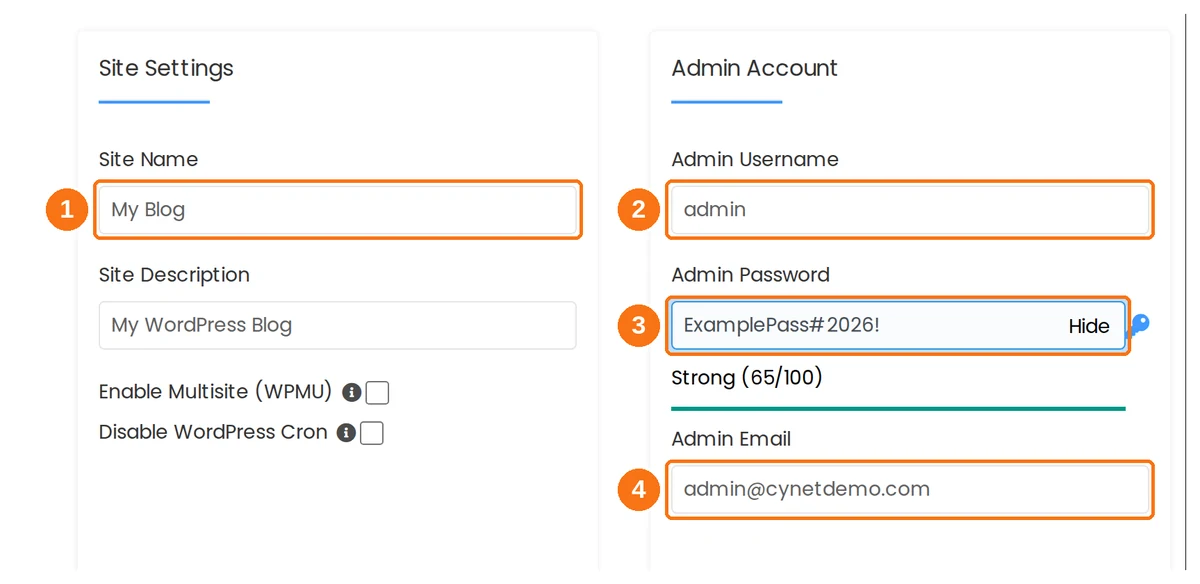
Every one of these arrives pre-filled, and two of the defaults need changing:
- Site Name — pre-filled
My Blog, with Site Description asMy WordPress Blog. Both appear in your site title and in search results, so replace them. You can change them later under Settings → General. - Admin Username — pre-filled as
admin, and you should change it. That is the first username every brute-force bot tries, and WordPress gives you no way to rename it from the dashboard afterwards. - Admin Password — Softaculous generates a strong one for you. Click the key icon for a different one, or Hide to mask it. Copy it somewhere safe before you install.
- Admin Email — pre-filled
[email protected]. Use a mailbox you can actually read; password resets go here.
Select Plugins
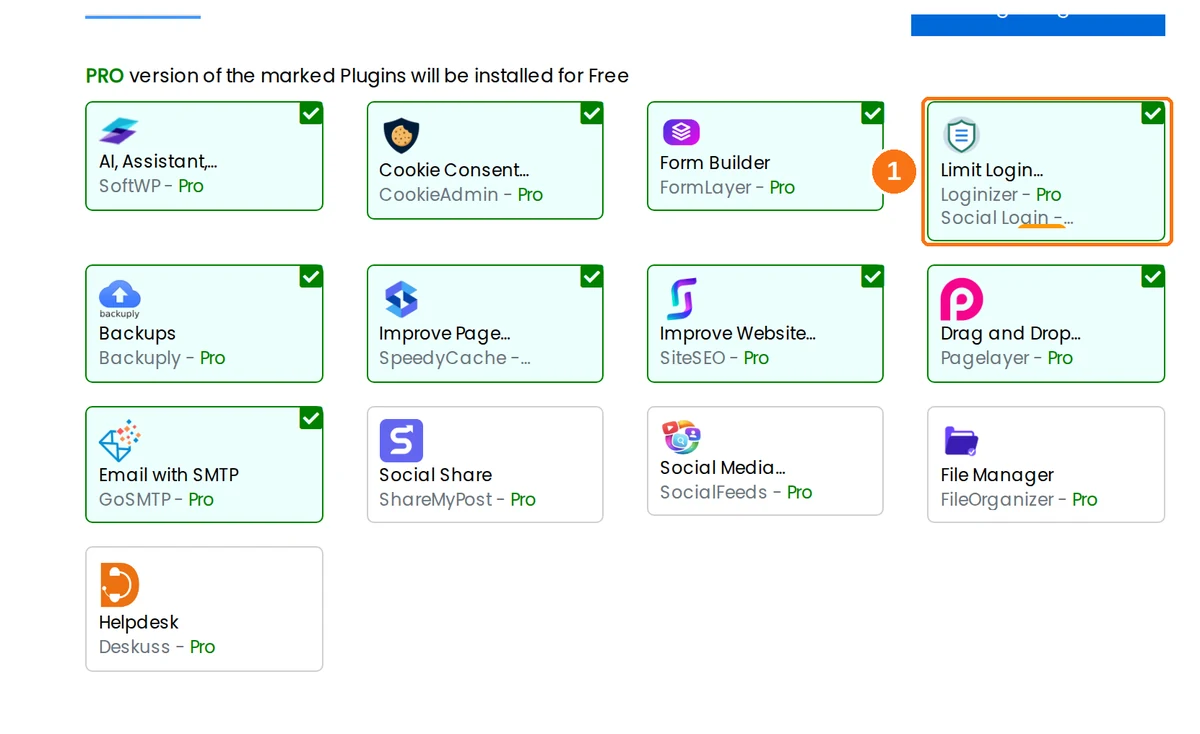
These come pre-ticked — most of them. Softaculous arrives with 9 of the 13 bundled plugins already selected, so this is an opt-out list, not an opt-in one. Leaving it alone puts a page builder, an SEO plugin, a cache plugin, a cookie banner and more on a brand-new site before you have written a word.
Untick everything you have not decided you want. Limit Login Attempts (Loginizer), marked 1, is the one worth keeping — it blocks repeated failed logins. Add the rest later from the WordPress dashboard, where you can see what each one does.
Language
Select your preferred language (default: English).
Step 5: Click Install
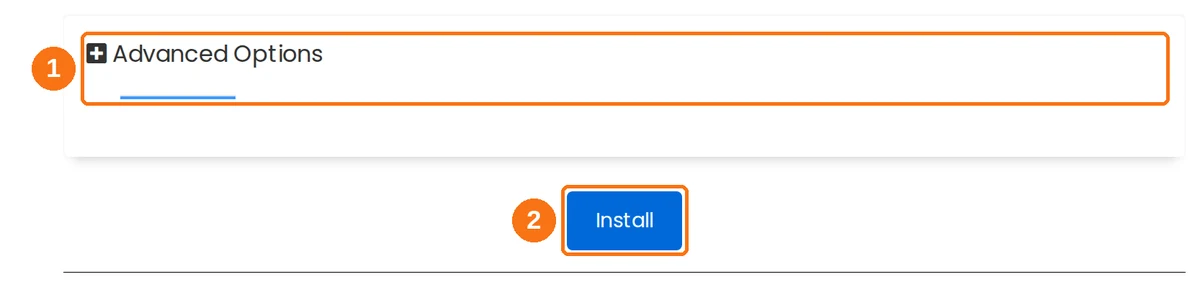
Advanced Options (marked 1) is collapsed by default. Expand it if you want to:
- Change the database name or table prefix. Softaculous already randomises the prefix —
wpvq_rather than the predictablewp_— so there is no security reason to change it yourself. - Turn on Automated backups: set it to Once a day and Backup Rotation to 4. It defaults to Don't backup, so this is off unless you switch it on.
- Adjust Auto Upgrade for WordPress core, plugins and themes. Plugin and theme auto-upgrades are already on.
- Create the database
- Download and install WordPress files
- Configure the
wp-config.phpfile - Set up the admin account
Step 6: Done!
Softaculous will display a success message with two important links:
- Website URL:
https://yourdomain.com— Your live website - Admin URL:
https://yourdomain.com/wp-admin— Your WordPress dashboard
First Steps After Installation
Log in to WordPress Admin
- Go to
https://yourdomain.com/wp-admin - Enter the admin username and password you set during installation
- You'll see the WordPress Dashboard
Essential First Tasks
- Set permalinks: Go to Settings → Permalinks → Select Post name → Save (best for SEO)
- Delete sample content: Remove the sample "Hello World" post and "Sample Page"
- Install a theme: Go to Appearance → Themes → Add New → Search and install your preferred theme
- Install essential plugins:
- Set up SSL redirect: If not already done, go to Settings → General → Ensure both URLs use
https://
Installing WordPress on a Subdomain or Addon Domain
The process is identical — just select the subdomain or addon domain from the Choose Domain dropdown in Step 4. Ensure the domain is already added in cPanel → Domains before installing.
Troubleshooting
"Installation directory is not empty"
The target folder already contains files. Either:
- Delete the existing files in that directory (cPanel → File Manager)
- Choose a different directory for the installation
WordPress installed but shows "Not Secure"
AutoSSL may not have issued yet. Go to cPanel → SSL/TLS Status → Run AutoSSL. Then update your WordPress URLs to https:// in Settings → General.
Forgot admin password
- Go to
yourdomain.com/wp-admin - Click Lost your password?
- Enter your admin email — a reset link will be sent
- Alternatively, reset via Softaculous: cPanel → Softaculous → WordPress Installations → Edit → change the admin password
Can't find Softaculous in cPanel
Softaculous is available on Business Hosting and most shared plans. If you're on a WordPress Hosting plan, use WP Toolkit instead. If it's missing, contact Cynet support.