
When logging in to cPanel or performing file operations, you may encounter the following error:
Write failed: Disk quota exceeded (122)
This means your hosting account has used 100% of its allocated disk space and the server can no longer write new data.
Symptoms
- cPanel displays the "Disk quota exceeded" error on login or during file operations
- Unable to upload files via File Manager or FTP
- Website errors (pages not loading, broken uploads, database write failures)
- Unable to send or receive emails (mailbox full)
- WordPress or CMS admin panel showing write errors
- Backups failing to complete
Causes
Your hosting disk quota has been fully consumed. Common causes include:
- Old backups — cPanel or plugin-generated backups stored in your account
- Large email mailboxes — Emails with heavy attachments accumulating over time
- Error logs — Oversized log files from PHP errors or access logs
- Unused files — Old website versions, unused themes, plugins, or uploads
- Database bloat — Large, unoptimised databases with excessive post revisions, spam comments, or log tables
- Trash and spam folders — Deleted files and spam emails still occupying space
Solution
Step 1: Log in to cPanel
If cPanel shows the error on login, try refreshing the page — it often loads on the second attempt. Alternatively, log in via the Cynet client area (which bypasses the direct login).
Step 2: Check Disk Usage
Go to cPanel → Disk Usage, under the Files section.
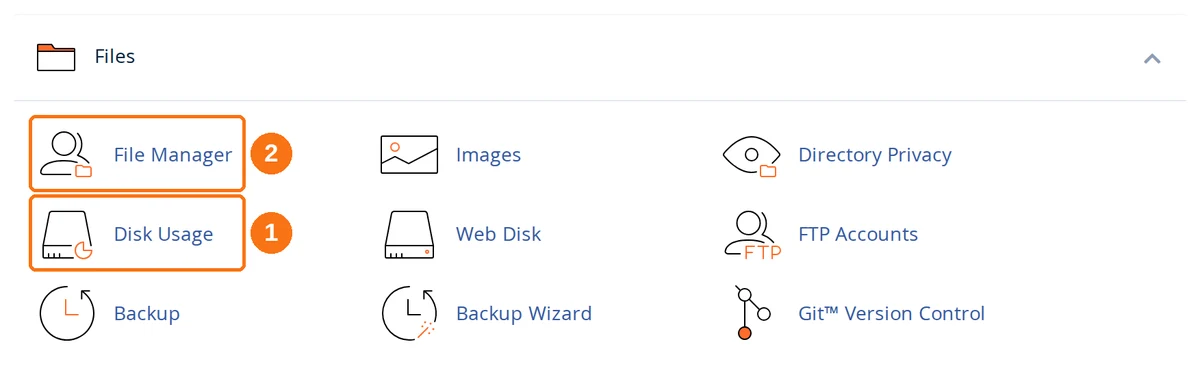
- Disk Usage — the breakdown of what is filling the account. Start here.
- File Manager — where you delete what you find. You come back to this in Step 3.
Read the summary table
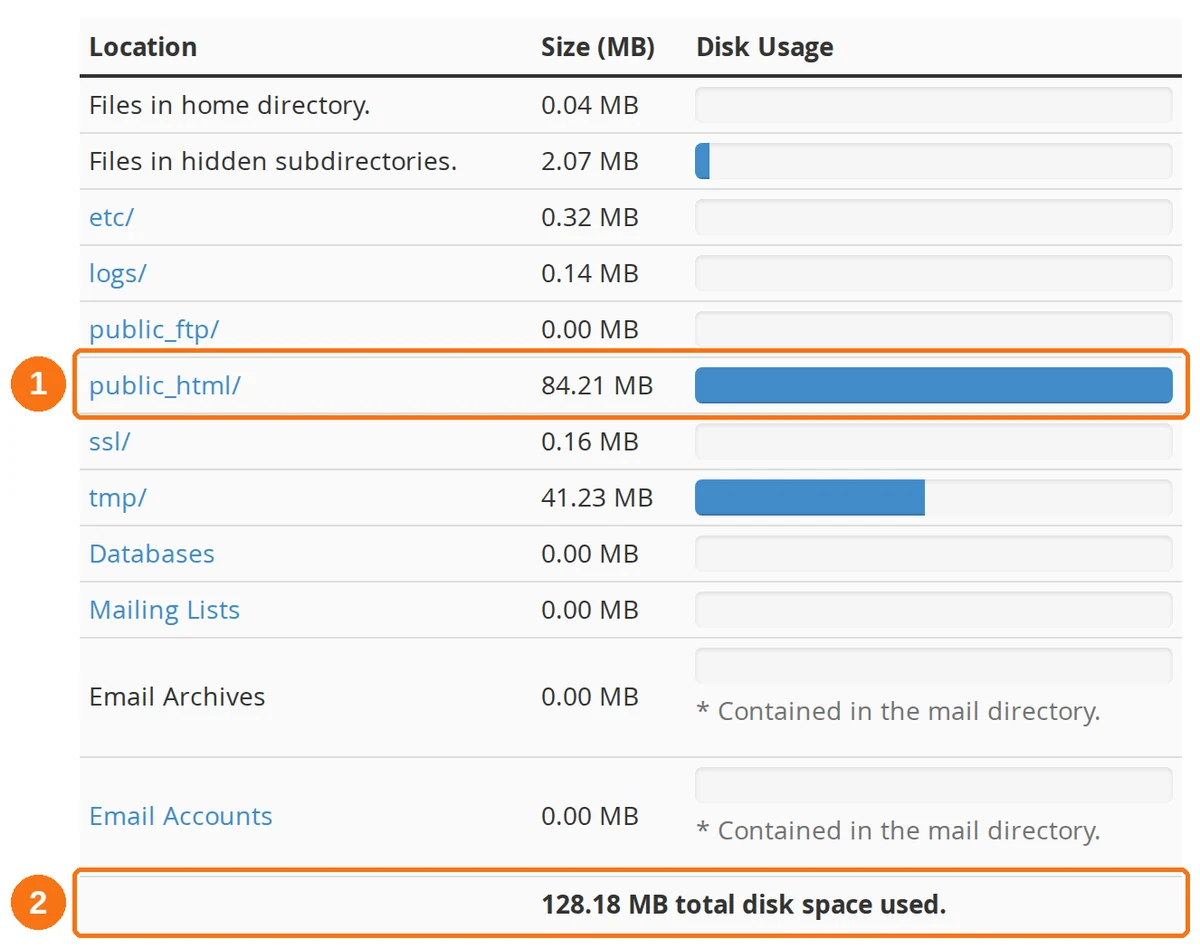
- The largest directory on the account. Every bar is drawn relative to this one, so the full-width bar marks your biggest consumer whatever the number next to it says.
- Your total usage, on the last row of the table.
mail directory rather than alongside it.
Where your quota is shown
This page never mentions your quota. It shows what you are using, not the ceiling you are hitting. The limit lives in the Statistics panel in the right-hand sidebar of the cPanel home page.
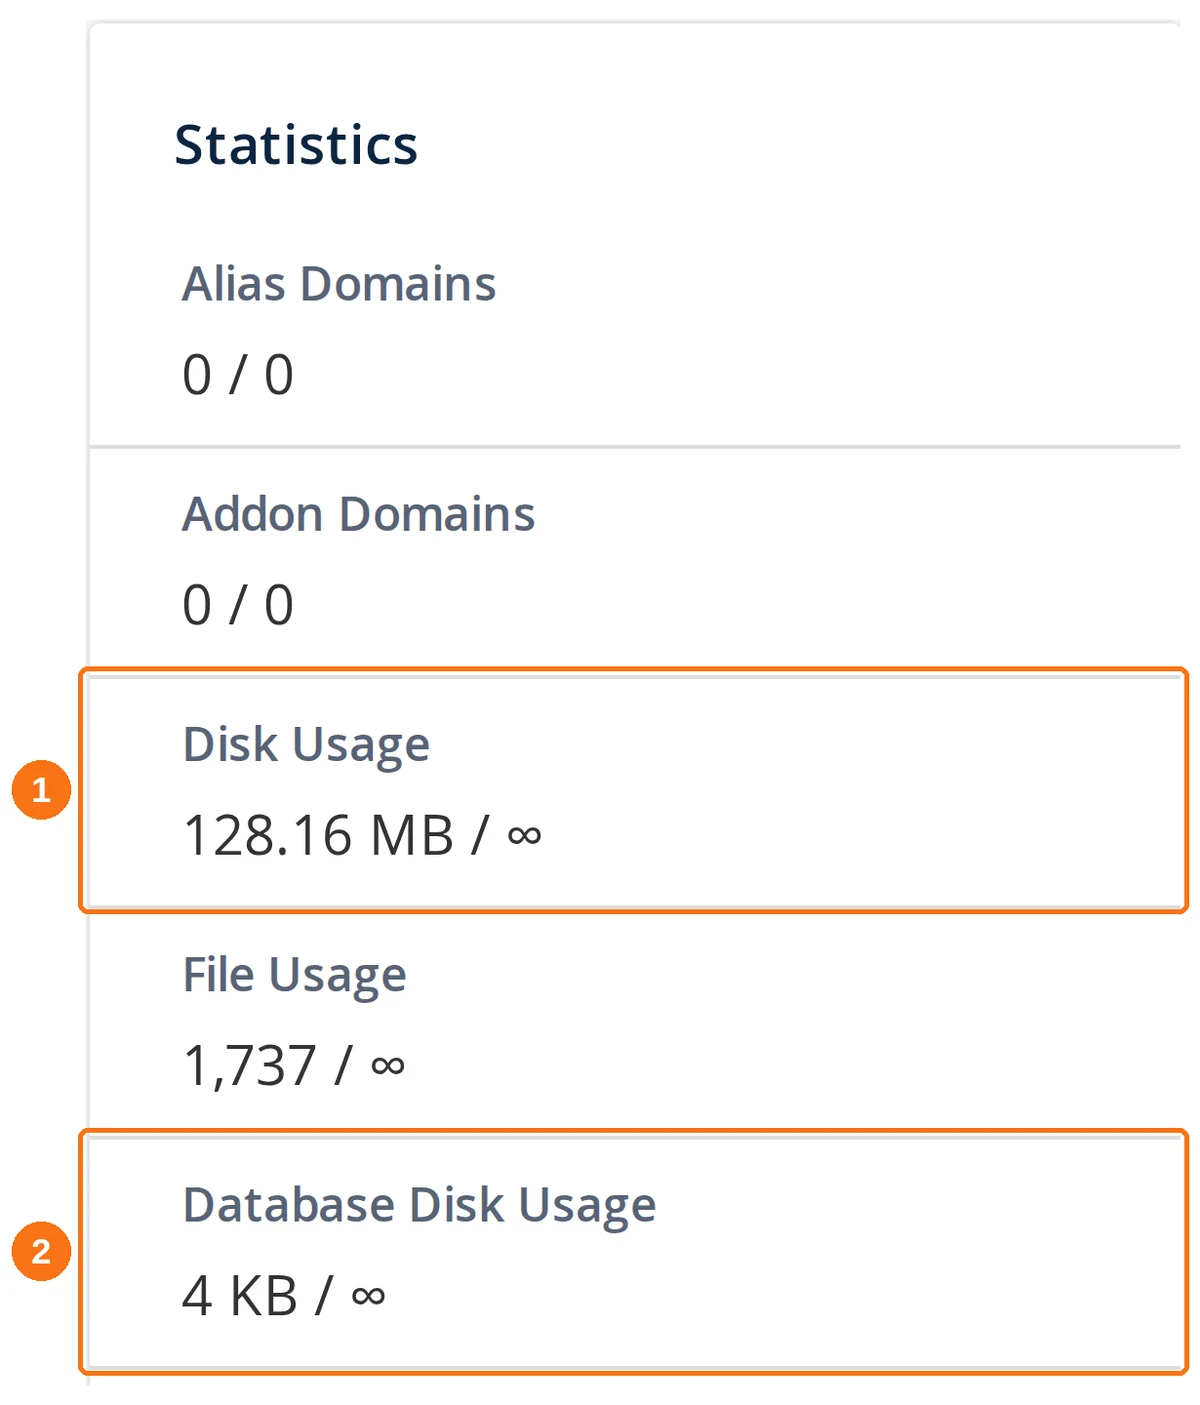
- Disk Usage — space used against your plan's limit. This pair of numbers is what "quota exceeded" refers to.
- Database Disk Usage — what MySQL is holding, listed separately in the sidebar.
Note: The account in this screenshot is on an unlimited-storage plan, so its limit shows as an infinity symbol. On a plan with a set quota you will see your allowance there instead.
Find the biggest folders
Below the summary is a directory tree, and it opens sorted alphabetically — which tells you nothing when you are hunting for space. Switch the sort.
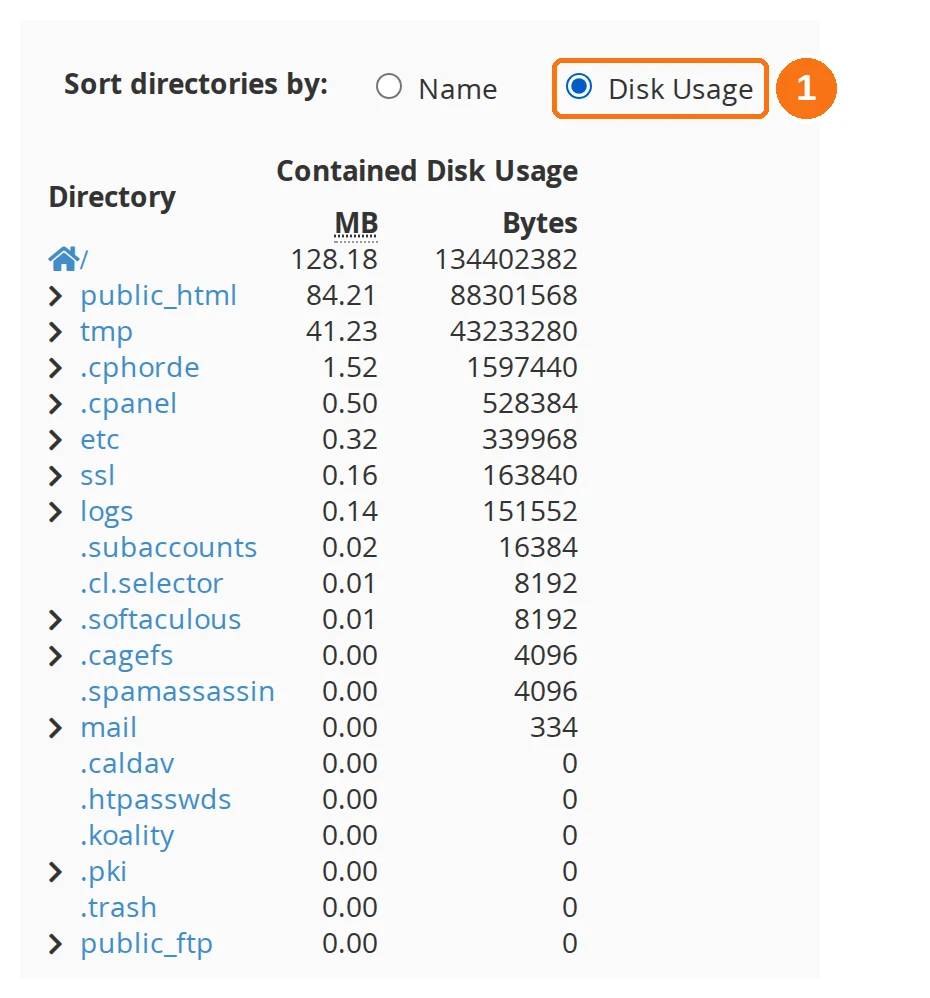
- Sort directories by: Disk Usage — reorders the tree biggest-first. Use the arrow beside a folder to open it and drill down.
Note: cPanel warns on this page that the figures may not reflect very recent changes, and that File Manager can report different sizes — it measures the files themselves, while Disk Usage measures the space their contents occupy on disk. After a clean-up, judge progress by the Statistics panel rather than by making the two agree.
Step 3: Free Up Disk Space
Work through these common areas, starting with the biggest offenders:
Delete Old Backups
Backups are often the largest space consumers:
- Go to cPanel → File Manager
- Check the home directory (
/home/username/) for files like:
backup-*.tar.gz - cpmove-*.tar.gz - Files ending in .sql.gz or .zip that are old database/site backups
- Also check
/public_html/for backup files left by plugins (e.g.,wp-content/updraft/,wp-content/ai1wm-backups/) - Download any backups you want to keep to your local computer, then delete them from the server
Clear Email Mailboxes
- Go to cPanel → Email Disk Usage, in the Email section — it exists for exactly this job.
- It lists every folder in a mailbox with its message count and size, so Trash and Junk are visible without opening webmail.
- Pick a folder and delete old messages from it there, largest folders first.
- For a per-account view instead, cPanel → Email Accounts shows storage used against each account's allocation.
- Before deleting anything you may want later, download it to Outlook over POP3 — see How to Download Emails Using Outlook.
Delete Error Logs
- In File Manager, navigate to your home directory
- Look for large log files:
error_log (in /public_html/ or subdirectories) - access-logs/ directory
- Delete or truncate oversized log files
- Fix the underlying errors causing the logs to grow (check your website's PHP code)
Remove Unused Files
- In File Manager →
/public_html/:
/wp-content/cache/ folder if using a caching plugin
- Delete any test files, temporary uploads, or development files you no longer need
Optimise Databases
- Go to cPanel → phpMyAdmin
- Select your database
- Click Check All → choose Optimize table from the dropdown
- For WordPress specifically:
wp-config.php: define('WP_POST_REVISIONS', 5); - Use a plugin like WP-Optimize to clean up database overhead
Step 4: Verify the Fix
After freeing up space:
- Check the Statistics panel on the cPanel home page and confirm usage is back below your limit — the Disk Usage tool shows what you are using but never the limit itself
- Refresh cPanel — the error message should be gone
- Test your website to confirm it's working normally
Prevention
- Schedule regular clean-ups — Review disk usage monthly and delete old files
- Configure backup retention — If using a backup plugin, set it to keep only 2–3 recent backups and delete older ones automatically
- Monitor mailbox sizes — Encourage email users to archive old messages locally and empty Trash regularly
- Fix PHP errors — Resolve coding issues that generate large error logs
- Consider upgrading — If you consistently run low on disk space, upgrade to a higher hosting plan with more storage via the Cynet client area