
A full cPanel backup creates a complete snapshot of your hosting account — website files, email accounts, databases, DNS zone files, and cPanel settings. This is essential before making major changes, migrating to a new server, or as a routine disaster recovery measure.
Before you start, know the one limitation that shapes everything below: a full backup can be created and downloaded by you, but it cannot be restored by you. cPanel says so on the page itself. Full backups are for migrations and for handing to support. The backups you can restore yourself are the partial ones further down the same page.
What's Included in a Full Backup
| Component | Details |
|---|---|
| Website files | Everything in /public_html/ and all subdomains |
| Email accounts | All mailboxes, filters, forwarders, and autoresponders |
| Databases | All MySQL databases and users |
| DNS zone files | Custom DNS records configured in Zone Editor |
| cPanel settings | Cron jobs, SSL certificates, redirects, and configurations |
Steps
Step 1: Log in to cPanel
Navigate to yourdomain.com/cpanel or log in via the Cynet client area at manage.cynet.com.my → My Services → Web Hosting → Manage → cPanel Login.
Step 2: Open the Backup Tool
In the cPanel dashboard, scroll to the Files section and click Backup.
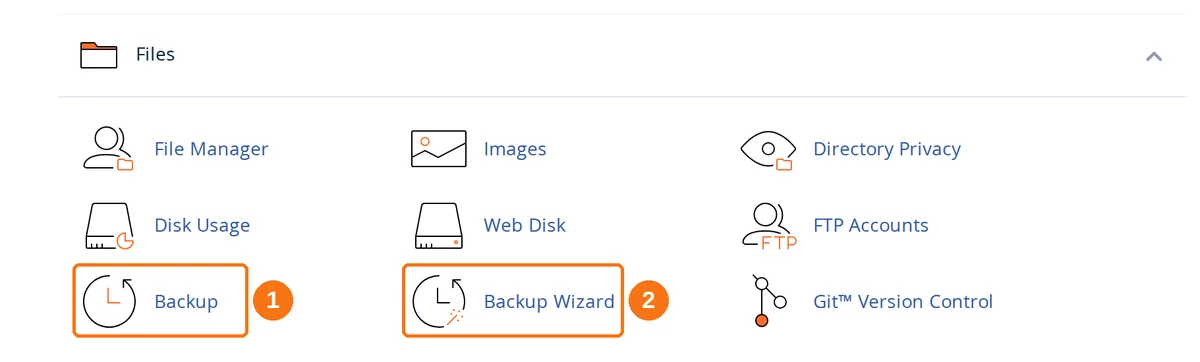
- Backup — the full page, with every backup and restore option on it. Use this one.
- Backup Wizard — the same features behind a three-screen question-and-answer flow. Covered at the end of this guide.
Step 3: Click Download a Full Account Backup
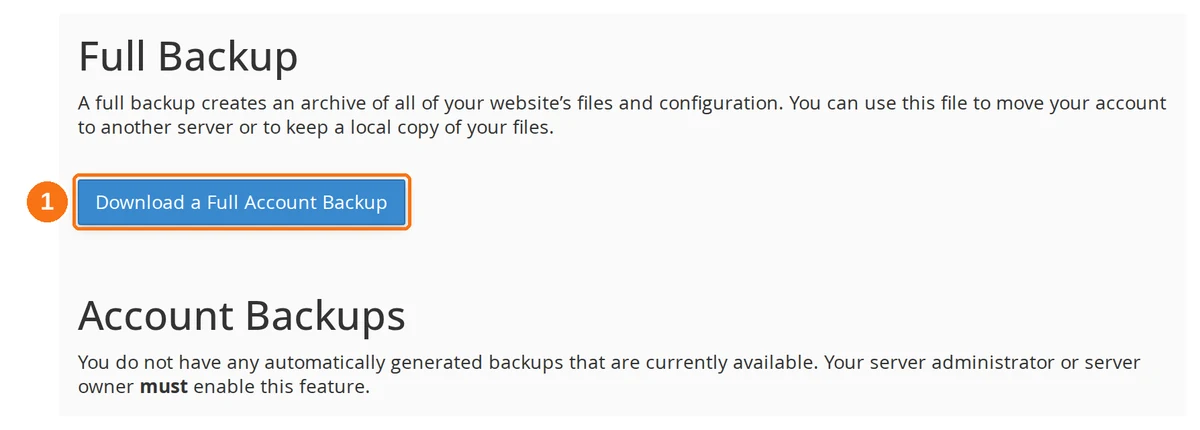
Despite the name, this button does not download anything. It opens the form where you request the backup — the download comes later, once the server has built the archive.
Underneath it sits Account Backups, which lists server-generated automatic backups. If it says none are available, this server does not keep automatic backups for your account, and the manual backup below is the only copy you will have. Do not count on finding a restore point there.
Step 4: Configure and Generate
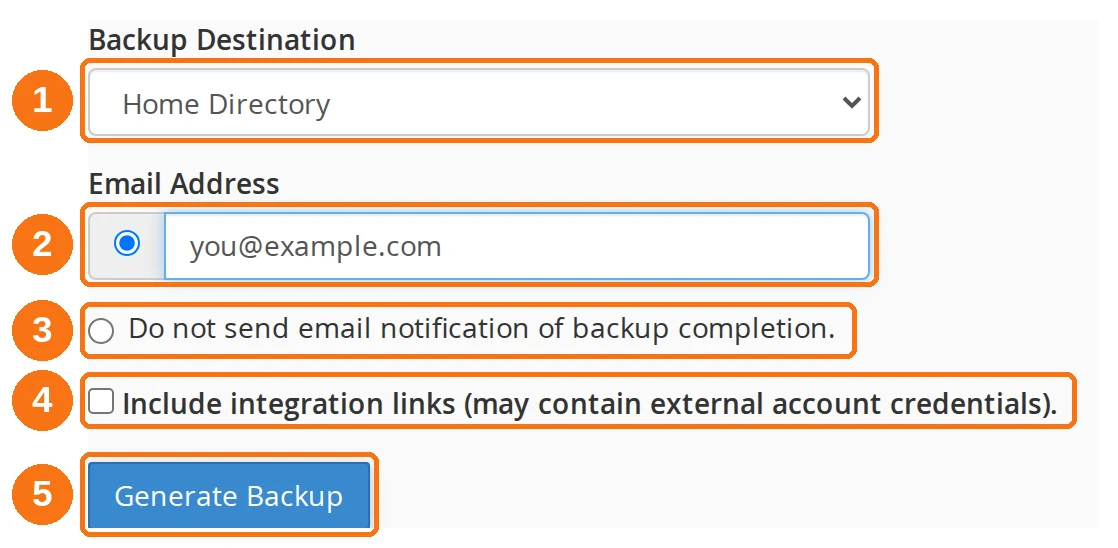
- Backup Destination — leave it on Home Directory. The other options (Remote FTP Server, Remote FTP passive, Secure Copy) push the archive straight to another server and ask for that server's credentials.
- Email Address — where the "your backup is ready" notification goes. It is pre-selected, so fill it in.
- Do not send email notification of backup completion — pick this instead if you would rather just check back later.
- Include integration links — leave this unticked. cPanel warns that integration links may contain credentials for external accounts, and a backup archive is a file you are about to move around.
- Generate Backup — click once. The page confirms the request and the work happens in the background.
Step 5: Wait for Completion
cPanel generates the backup in the background. Depending on your account size, this can take:
- Small accounts (under 1 GB): A few minutes
- Medium accounts (1–5 GB): 10–30 minutes
- Large accounts (5+ GB): 30 minutes to a few hours
Step 6: Download the Backup
- Go back to cPanel → Backup → Download a Full Account Backup
- Completed archives are listed at the top of that page under Backups Available for Download, named like
backup-9.16.2026_09-30-00_yourusername.tar.gz - Click the filename to download it to your computer
- Store the backup somewhere off the server — an external drive or cloud storage
Partial Backups — the Ones You Can Restore
The lower half of the Backup page is the part most people actually need. Each item has a download on the left and an upload restore on the right.
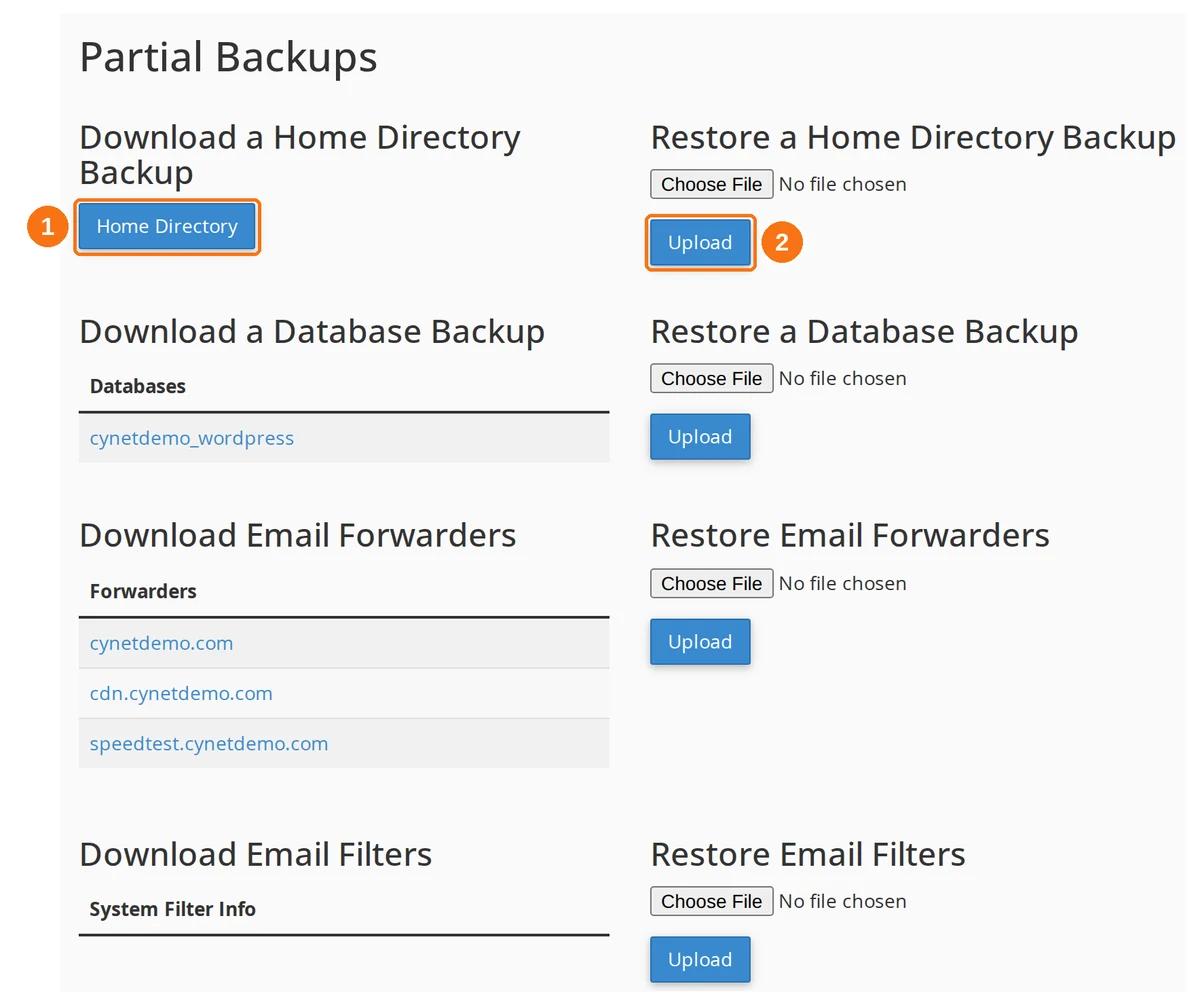
- Download — click the button or the item name to save that piece of your account.
- Restore — choose the file you downloaded earlier and click Upload to put it back.
.sql.gz per database), Email Forwarders, and Email Filters. Databases, forwarders and filters are listed by name, so you pick the one you want rather than taking all of them.
Use these when you want a safety net before editing a site: a home directory backup and a database backup together cover everything a WordPress install consists of, and you can restore both yourself without opening a ticket.
Using Backup Wizard (Alternative)
The Backup Wizard covers the same ground in three screens:
- Go to cPanel → Files → Backup Wizard
- Back Up or Restore — choose Back Up
- Full or Partial Backup — choose which, then follow the prompts
Restoring From a Backup
Important: On shared hosting, you cannot restore a full backup yourself — cPanel states this at the top of the full backup page. Full backup restoration must be done by the server administrator. Contact Cynet support with your backup file and we will restore it for you.
Restoring Partial Backups (Self-Service)
You can restore individual components yourself, from the Partial Backups section shown above:
- Files — cPanel → Backup → Restore a Home Directory Backup → Choose File → Upload
- A database — cPanel → Backup → Restore a Database Backup → Choose File → Upload
- Email forwarders or filters — the same pattern, using their own Upload buttons
Automating Backups
cPanel's built-in backup tool does not support scheduled automatic backups. For automated backups, consider:
- Softaculous (Business plan) — Set up automatic WordPress backups in Softaculous → Edit Installation → Backup Settings
- WP Toolkit (WordPress plan) — Configure scheduled backups in WP Toolkit
- Cron Job — Advanced users can create a cron job to automate backups (contact support for guidance)
- Third-party plugins — WordPress plugins like UpdraftPlus or BlogVault can schedule automatic backups to cloud storage (Google Drive, Dropbox, etc.)
Best Practices
- Back up before major changes — Always create a backup before updating WordPress, installing new software, or modifying core files
- Download backups locally — Don't rely solely on server-stored backups; download them to your computer or cloud storage
- Prefer partial backups for routine safety nets — they are smaller, faster, and you can restore them without a support ticket
- Regular schedule — Create a full backup at least once a month, or weekly for active websites
- Test your backups — Periodically verify that your backup files are complete and can be restored
- Delete old backups from the server — Backup files are large and count towards your disk quota. Download them locally, then delete the server copy to free space
- Keep multiple copies — Store at least 2–3 recent backups in different locations
Troubleshooting
Backup fails or takes too long
- Your account may be too large. Try creating partial backups (files and databases separately) instead of a full backup
- Check your disk usage — if you're near the quota, the backup may fail because there's no room to store the backup file
- Contact Cynet support for assistance with large account backups
Backup file is corrupted or won't download
- Try downloading again — the connection may have timed out during a large download
- Use FTP (FileZilla) to download the backup file from your home directory instead of the browser
- The backup file is located at
/home/yourusername/in cPanel File Manager
"Backup in progress" message won't go away
- A previous backup may still be generating. Wait for it to complete
- If it's stuck for more than a few hours, contact Cynet support to clear the backup queue
Nothing listed under Account Backups
That section shows automatic backups made by the server, not the ones you generate. If it reports that none are available, the feature is not enabled for your account and there is nothing to recover there — your own manual backups are the ones to rely on.