
Microsoft Outlook is the most popular desktop email client for professionals. This guide walks you through adding your Cynet cPanel email account to Outlook on Windows or Mac.
Prerequisites
- A cPanel email account already created (see How to Create an Email Account in cPanel)
- Microsoft Outlook installed (Outlook 2016, 2019, 2021, or Microsoft 365)
- Your email address and password ready
Email Server Settings
cPanel publishes the exact settings for your mailbox, and they are worth reading rather than guessing — the server name in particular is not what most guides assume.
Where to find them
In cPanel, go to Email Accounts, find the mailbox and click Connect Devices.
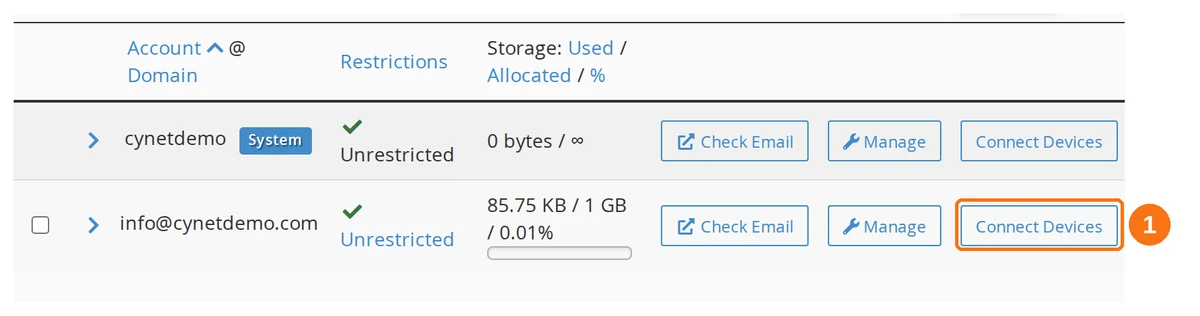
That opens "Set Up Mail Client" for that address. Scroll past the scripts to Mail Client Manual Settings.
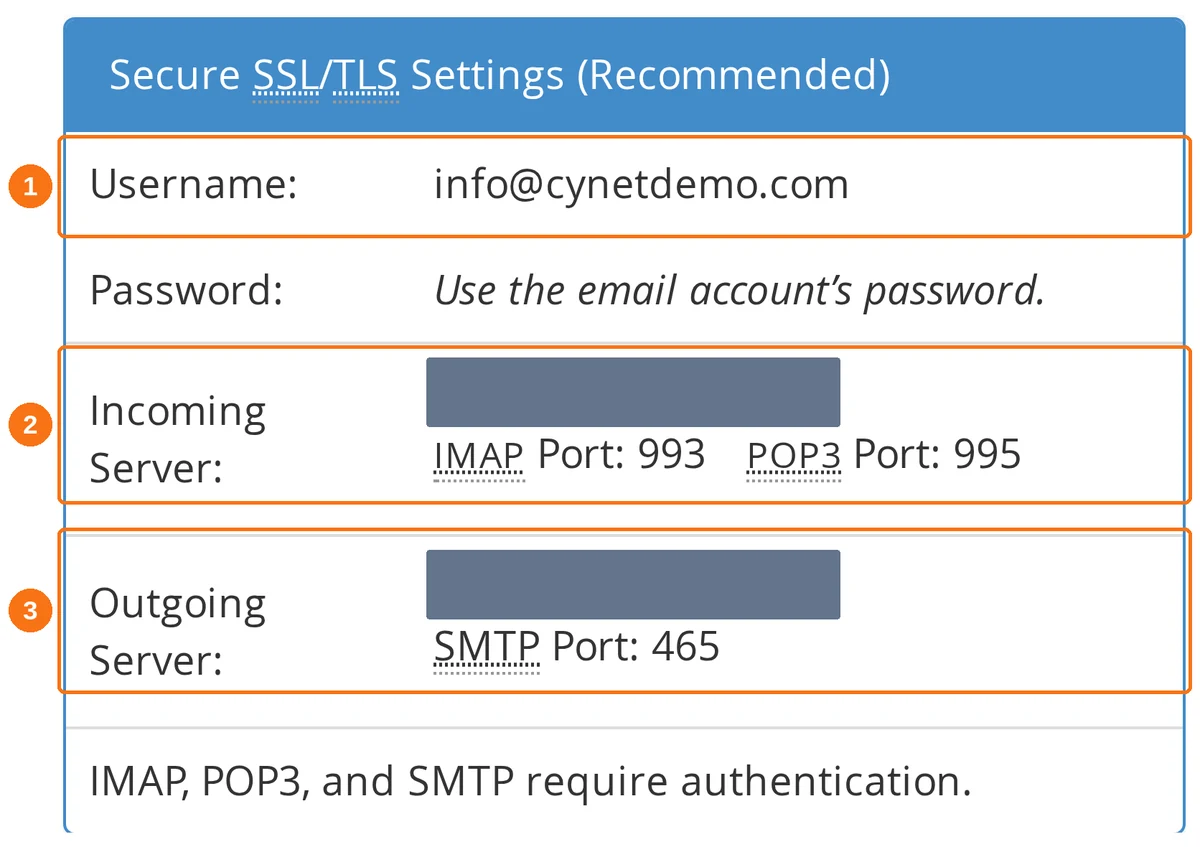
- Username — your full email address, not just the part before the @.
- Incoming Server — IMAP on port 993, or POP3 on 995.
- Outgoing Server — SMTP on port 465.
Important: The server name is blanked out in the screenshot deliberately — it is the hostname of the server your account sits on, and it is different for every account, so there is no value worth copying from here. Yours is spelled out on your own Connect Devices page, and that is the one Outlook needs.
Why not mail.yourdomain.com?
mail.yourdomain.com usually resolves to the same server, and it works for an unencrypted connection. Over SSL/TLS it can fail, because the certificate the server presents is issued for the server's hostname — so the mail client sees a name mismatch and refuses to connect, or nags about an untrusted certificate on every send. cPanel recommends the server hostname for exactly this reason. Use what the Connect Devices page shows you and the certificate matches.
| Setting | Value |
|---|---|
| Incoming Server (IMAP) | The server hostname from Connect Devices |
| IMAP Port | 993 |
| Incoming Encryption | SSL/TLS |
| Outgoing Server (SMTP) | The server hostname from Connect Devices |
| SMTP Port | 465 |
| Outgoing Encryption | SSL/TLS |
| Username | Your full email address |
| Authentication | Normal password |
Try the automatic setup first
The same page offers configuration scripts that set a client up in one click.
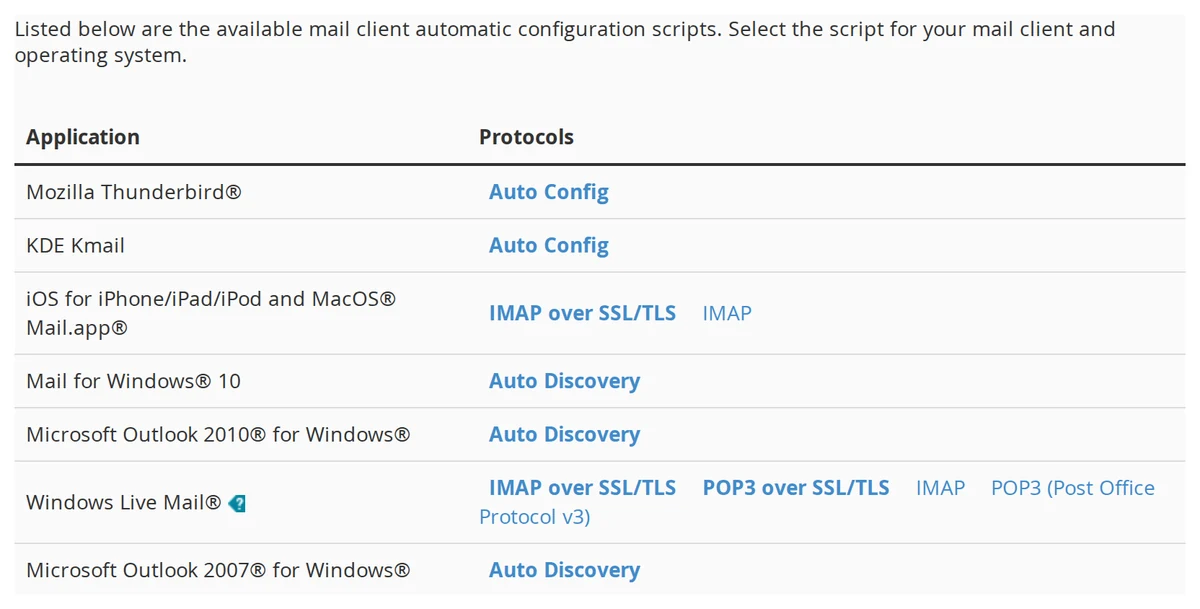
Useful if your client is on the list — but note what is not. The newest Outlook it offers is Outlook 2010, so for Outlook 2016, 2019, 2021 and Microsoft 365 you are configuring by hand, which is what the rest of this guide does.
Steps for Outlook on Windows
Step 1: Open Account Settings
- Open Microsoft Outlook
- Click File in the top menu bar
- Click Add Account
Step 2: Enter Your Email Address
- Type your full cPanel email address — the whole thing, including the domain
- Check the box Let me set up my account manually
- Click Connect
Step 3: Choose Account Type
Select IMAP as the account type.
IMAP vs POP3: Use IMAP if you access email from multiple devices (phone, laptop, tablet) — it keeps everything in sync. Use POP3 only if you want to download emails to a single device and remove them from the server.
Step 4: Enter Server Settings
Fill in the incoming and outgoing server details:
Incoming Mail:
- Server: the hostname from Connect Devices
- Port:
993 - Encryption method: SSL/TLS
Outgoing Mail:
- Server: the same hostname
- Port:
465 - Encryption method: SSL/TLS
Click Next.
Step 5: Enter Your Password
Enter the password for your cPanel email account and click Connect.
Step 6: Complete Setup
Outlook will test the connection. Once successful, click Done. Your email will begin syncing immediately.
Steps for Outlook on Mac
Step 1: Add a New Account
- Open Outlook for Mac
- Go to Outlook → Preferences → Accounts
- Click the + button and select New Account
Step 2: Enter Email and Configure
- Enter your full email address and click Continue
- When prompted, select IMAP/POP (not Microsoft 365 or Exchange)
- Enter the hostname from Connect Devices as both the incoming server (port
993, SSL enabled) and the outgoing server (port465, SSL enabled) - Enter your password
- Click Add Account
Verifying the Setup
After setup, verify everything works:
- Send a test email — Compose a message to another email address and confirm it's delivered
- Receive a test email — Send an email to your cPanel address from another account and check it arrives in Outlook
- Check Sent folder — Ensure sent emails appear in the Sent folder on both Outlook and webmail
Troubleshooting
"Login failed" or "Authentication error"
- Double-check your email address and password — they are case-sensitive
- Verify the account exists in cPanel → Email Accounts
- Try logging in via webmail (
yourdomain.com/webmail) to confirm credentials work
"Cannot connect to server"
- Verify the server name matches the one on your Connect Devices page (it is a server hostname, not
smtp.orimap.in front of your domain) - Ensure ports are correct: 993 for IMAP, 465 for SMTP
- Check that SSL/TLS encryption is selected (not STARTTLS or None)
- Make sure your internet connection and firewall allow these ports
Emails not syncing
- Confirm you selected IMAP, not POP3
- In Outlook, right-click your inbox and select Sync or Update Folder
- Check your mailbox quota in cPanel — a full mailbox won't receive new emails
Certificate warning
A certificate warning is the symptom of using mail.yourdomain.com as the server name: the certificate is issued for the hosting server's hostname, so the name does not match.
- The fix is to change the server name to the hostname on your Connect Devices page, in both the incoming and outgoing settings
- Clicking Accept or Trust also works and is safe on Cynet servers, but the warning comes back for every account you add